

Swipe left or swipe right? Just like scrolling through dating profiles, first impressions matter in the world of partnerships.
Building a knockout impact.com Marketplace listing can set you apart from the competition and make brands fall head-over-heels. This translates to more collabs (and more revenue, of course).
Ready to steal the spotlight? Let’s explore how to build a top-notch profile that leaves brands saying “Wow!” instead of “Pass!”
Table of contents
- What kind of listing steals brands’ hearts?
- Connecting your media properties
- How to set up your profile settings in 6 quick steps
- Add a clear profile image
- Write a description that showcases your services
- Boost discoverability with tagging
- Give prospective brands a way to reach you
- Highlight other content offerings in links
- Show off your full capabilities with a media kit
Key takeaways
- Brands use your Marketplace listing to understand your value as a partner and determine if you’re a good match.
- Connect your media properties to paint a complete picture of your online presence (and, for creators, show your engagement rates).
- Ensure your profile describes what you can do for brands and why they should partner with you.
- Fill out the most info possible so good-fit brands can easily find you in search.
What kind of listing steals brands’ hearts?
When you sign up for the impact.com Marketplace, you can connect with top global brands your audience will love. Whether you proactively apply to campaigns or wait for inbound opportunities, optimizing your listing helps you land more brand deals.
Your listing tells brands why they should pick you. It includes critical information such as your content, audience size, and the services you offer.
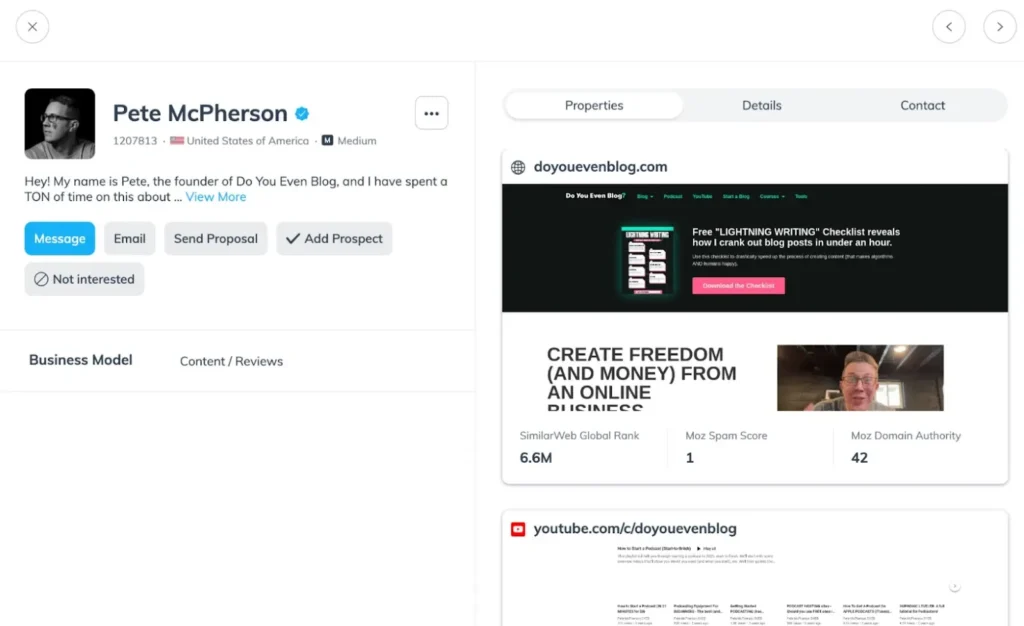
Brands evaluating Pete McPherson as a potential partner will skim this listing to determine if he’s a good fit for a campaign.
A standout listing:
- Flaunts your online presence with connected media properties
- Highlights how you help brands reach their marketing goals in the description
- Gives the most information possible so brands can discover you in search with the right tags
Now that you know what qualities make a listing pop, let’s explore where to add this information to your profile.
Connect your media properties before you set up your profile
Let’s start with the most important step: connecting media properties to your account.
Media properties are the online platforms where you promote brands. Think of your website, social media profiles, podcasts, etc.
When brands check out potential partners, they usually focus on media properties.
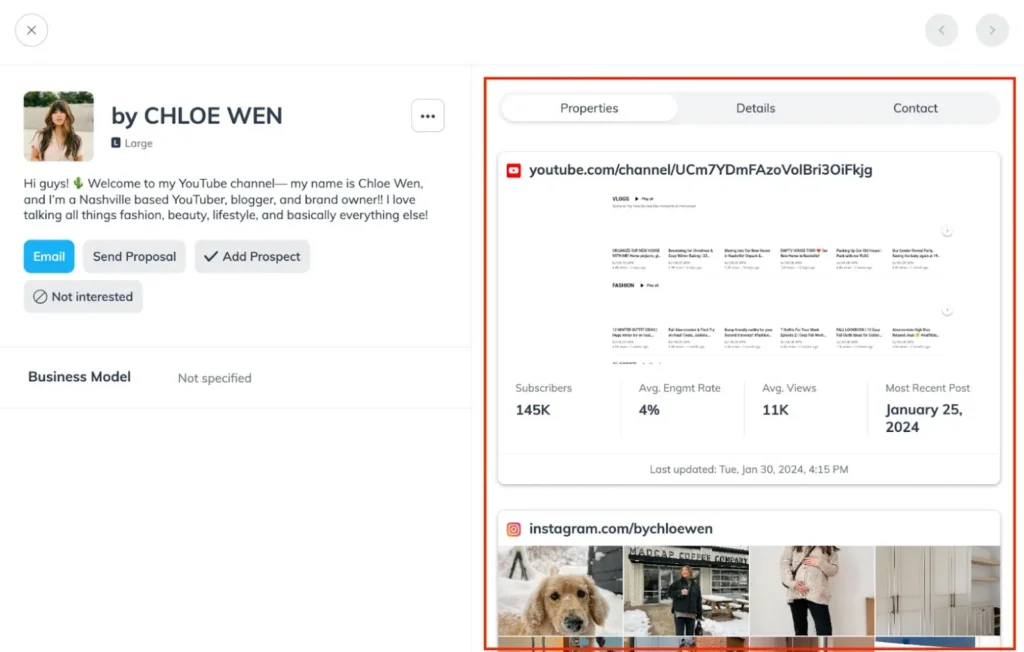
Creator Chloe Wen has connected and verified her media properties so potential brand partners can see where she can promote them.
You’ll want to send your website and social media properties through impact.com’s verification process. Verified properties confirm that your media properties belong to you—ensuring that no one can impersonate you or claim your content.
Verified properties offer benefits such as:
- Accurate content tracking and performance metrics right on the platform
- Being featured on curated brand recommendation lists for brands
- Giving your profile that extra dose of legitimacy
So, don’t forget to link up all your media properties before you move on to your profile settings. It’s the best way to show brands how you can promote them.
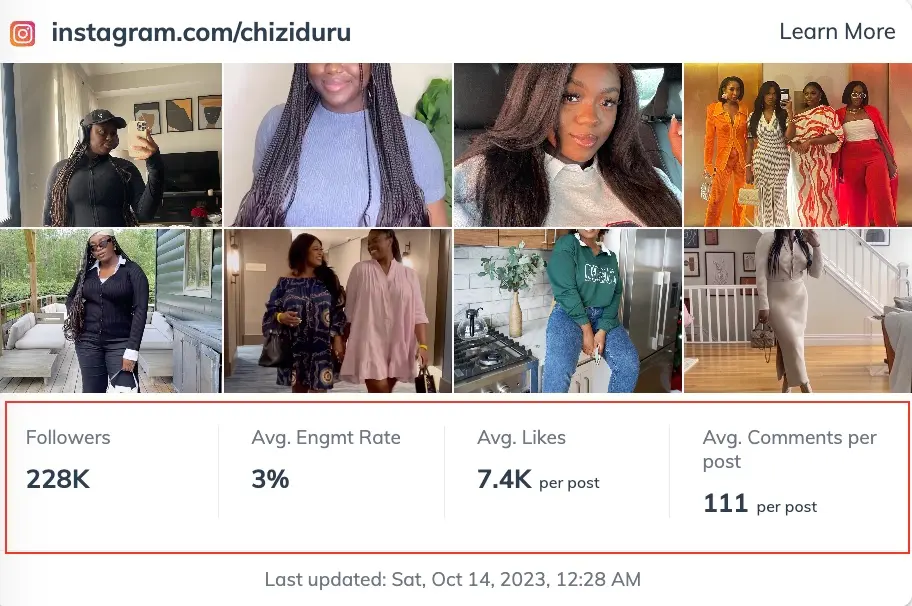
For creators, verified properties also pull in follower count and engagement rates. By showing these stats in her profile, creator Chizi Duru shows how she can help brands crush their marketing goals.
How to connect and verify your media properties
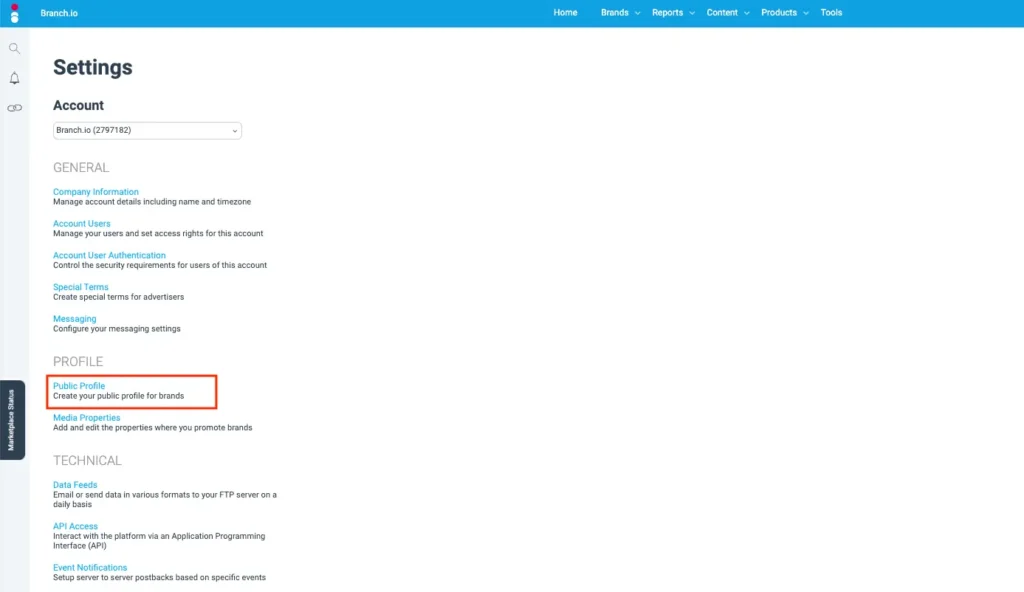
Start by navigating to the Media Properties screen under Settings > Profile > Media Properties.
Now it’s time to add a media property. In the top right corner, select Create Media Property and select the type of property you want to add.
Ensure the media property URL you add points to your specific pages or profile. This is your chance to showcase what you can do and why a brand should partner with you.
You’ll set up your media properties on this screen. Learn more about how to set yourself up for success on our platform by taking the impact.com product training for partners course.
We also strongly recommend going through the verification process. Verification connects your media properties to impact.com.
Though we can’t verify all types of websites and properties, it’s important to go through the process when you can.
Simply hover your cursor over your property and select Verify.

Depending on the property type, you may need to provide additional information to complete the verification process.
Check out our handy help article for more details on adding and verifying each type of media property.

Creators, are you leaving money on the table?
How to set up your profile settings in 6 quick steps
Brands often look for specific qualities in their partners. To catch a brand’s attention, fill out your profile as much as possible to show them you’re a perfect match. Plus, it boosts your visibility by making you easily discoverable in search.
Go to Settings > Profile > Public Profile to access your listing details. You can tweak certain elements of your listing on this page.
You can adjust all of the elements of your listing on this page. But just a heads up: Certain changes require approval by our team at impact.com. So there might be a little delay before changes go live on your listing.
Now let’s add all the details that will make your profile pop!
Step 1. Add a clear profile image
First, add your profile image under Logo. This image will appear next to your name in your listing, search, messaging, and more.
Consider how to put your best foot forward:
- If you’re a publisher, we recommend uploading a logo image—especially if you have a lot of brand recognition in your market.
- If you’re a creator, we recommend uploading a photo that reflects your personal brand, such as a headshot.
No matter what kind of image you choose, stay consistent. Use the same logo or headshot that you use across all of your other platforms to present a unified image.
Before uploading an image, make sure it’s crystal clear—not pixelated or distorted. Your image can be any size, but we recommend a 172×172 pixel, high-resolution image for the best results.
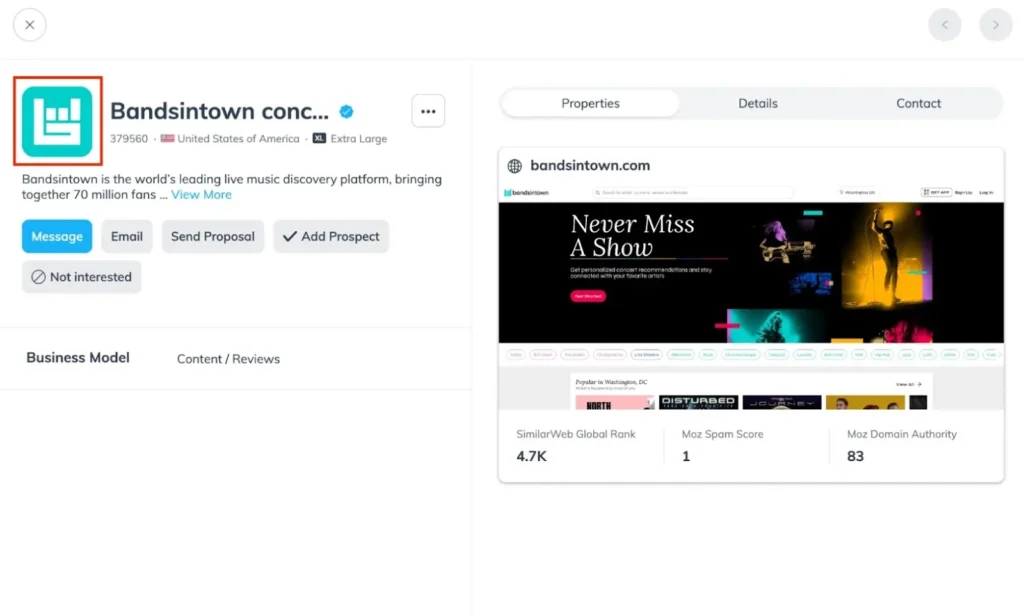
Bandsintown uploaded a clear, suitably sized logo that makes a great first impression on potential brand partners.
Step 2. Write a description that showcases your services
Now, it’s time to turn to the Description section. Seize this chance to highlight your unique value to brands.
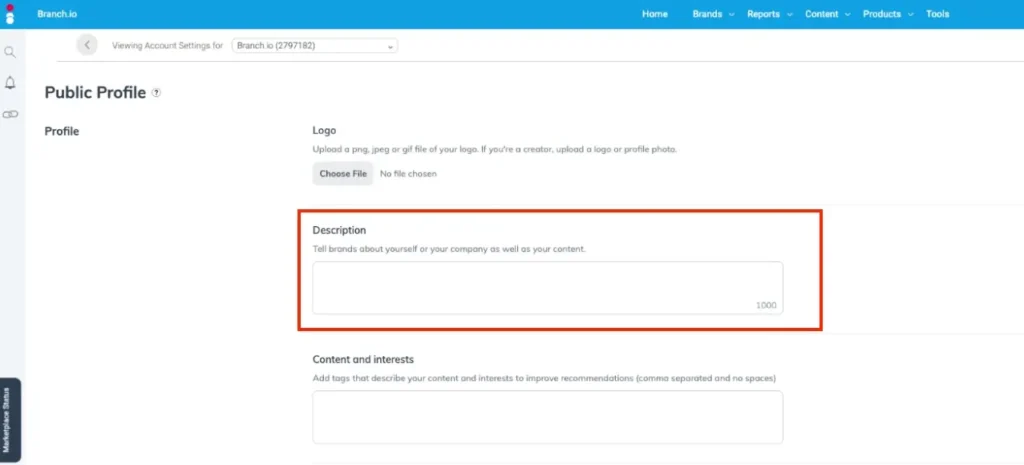
Discuss the type of content you create to complement your media properties. Make sure you also take a sentence or two to describe all the promotional opportunities you offer brands.
Think of the description as an elevator pitch. Brands can get a sneak peek of what you do (and what you can do for them) without starting a conversation.
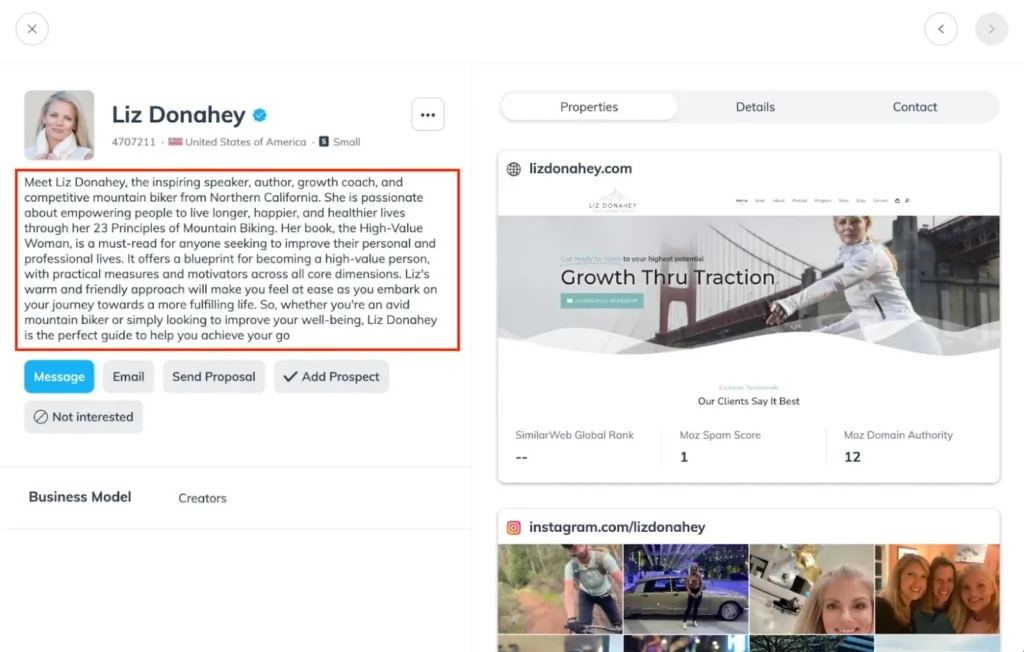
Creator Liz Donahey comprehensively describes who she is and what kind of content she creates.
Step 3. Boost discoverability by tagging your content, interests, and business model
To make it easier for brands to find you on impact.com, you’ll need to add relevant information about your content and business model.
Start by going to Content and Interest Tags. Enter tags that best describe your niche and the type of content you create so brands can better understand what you’re all about.
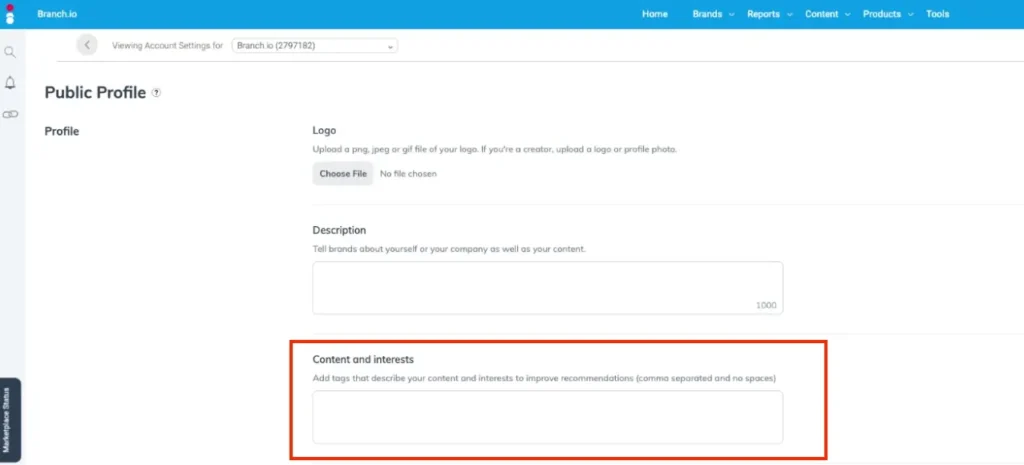
The tags should be relevant to your industry and the type of content you create. You can skim your description to help you identify relevant keywords.
These tags won’t appear in your listing, but they will identify keywords brands can use to find you in search.
When choosing keywords, it’s easy to get carried away and include every possible term. But it’s crucial to be selective and focus on the most important terms. The goal is to appear in search results for brands looking for someone like you. Remember, it’s about quality, not quantity!
Next, identify your business model from the Business Models dropdown menu.
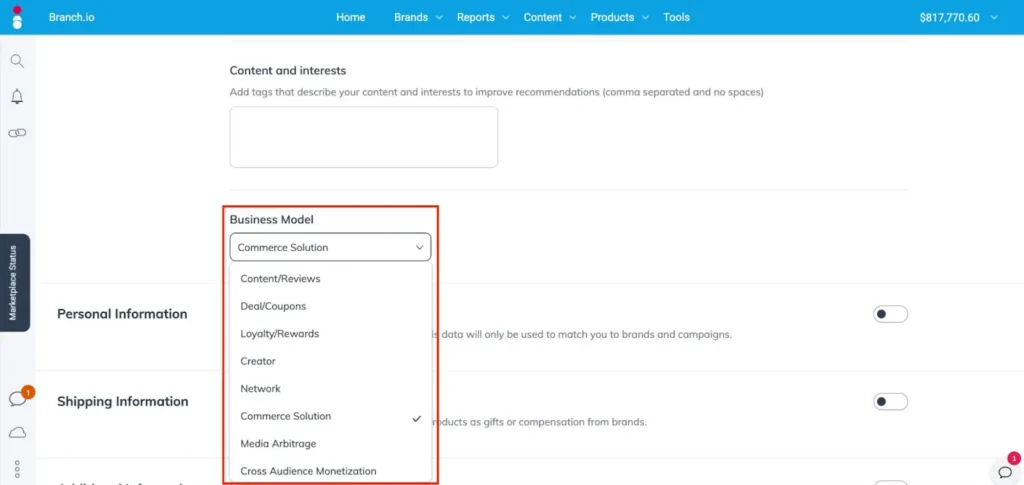
Picking the right model is essential because brands often look for specific types of partners that align with their marketing goals. Sharing this info will increase your chances of finding the perfect partnership or campaign.
Use these business model definitions as your guide:
- Content/reviews: Publishers focused on producing editorial content for promoting, comparing, and listing products/services.
- Deal/coupons: Publishers who aggregate/classify deals and promotions for consumer savings.
- Loyalty/rewards: Publishers who incentivize transactions from consumers, employees, or businesses through a membership/benefits reward program.
- Creator: Individuals who market products and services to their own audience on social media platforms.
- Network: Publisher platforms that broker access to brand campaigns and provide tracking, reporting, and payment services.
- Commerce solution: Site-side shopping tools/services that drive brand conversion optimization.
- Media arbitrage: Publishers that buy ads to sell or drive traffic to earn a commission.
- Cross-audience monetization: Publishers that monetize content by targeting different audiences across multiple channels and platforms.
If you are still looking for a business model that’s an exact match, go for the closest one to boost your search visibility. Then, elaborate on what you do in the Description section to help brands fully grasp your offerings.
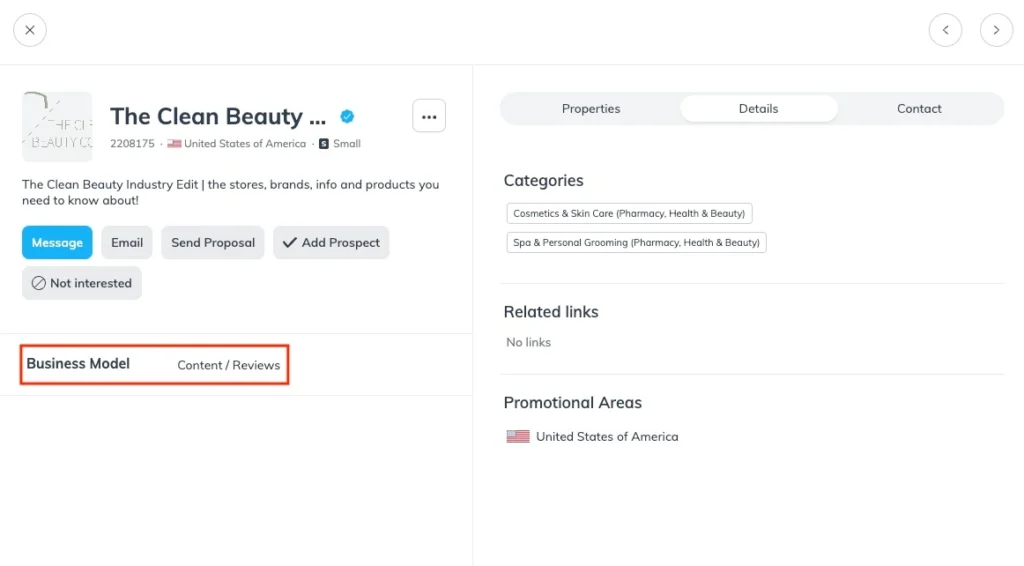
The Clean Beauty Industry Edit identified as a Content/Reviews publisher, letting potential brand partners know how they operate and can benefit brands.
Now it’s time to provide additional personal information about you or your publication in the Personal Information section.

Click on the toggle and share details such as your gender, ethnicity, and more. Volunteering these facts helps connect you with brands looking for publishers and creators like you.
Creators can especially benefit because brands are searching for people with the same values and connect with their target audiences.
Your personal information won’t appear in the listing to protect your privacy. We use this information to surface you to the right brands when searching for partners.
Step 4. Give prospective brands a way to reach you
Communication should be simple. Ensure that brands can effortlessly reach out to you when needed.
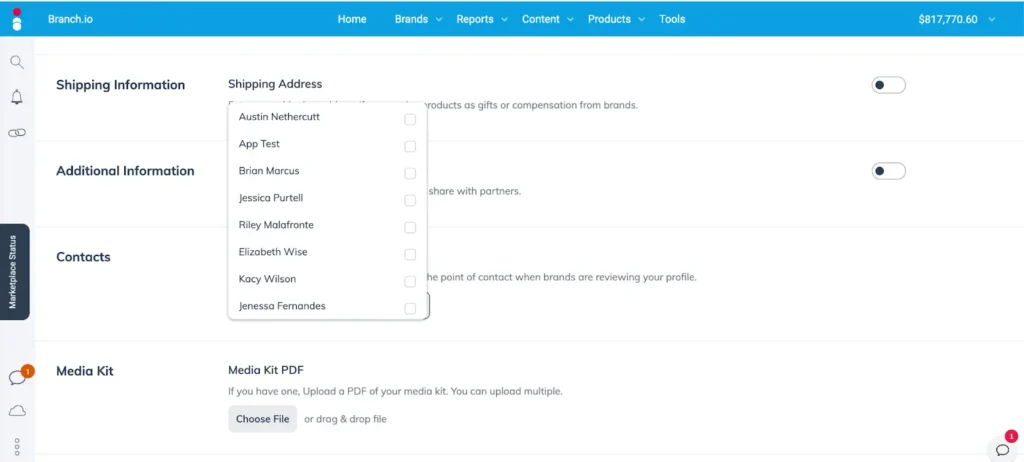
First, choose the primary point of contact for your account under Contacts.
Select which contact will receive notifications of inbound opportunities from brands from the dropdown. Their contact information will also appear in the listing. You can pick more than one person if needed.
Next, go to Shipping Address. If you plan on receiving tester products or product gifts from brands, click the toggle to open the menu and enter where you’d like those products sent.
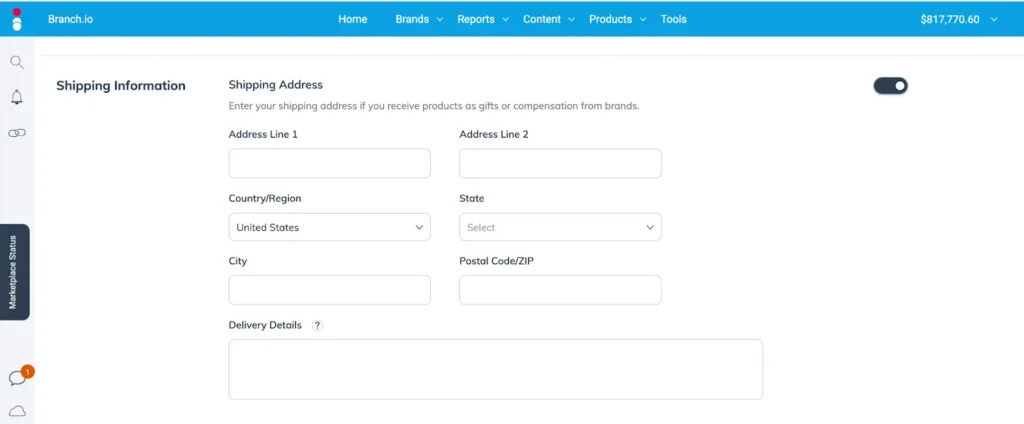
Your shipping address:
- Won’t show up on your public profile. We keep it safe and secure until a brand sends you something so you can sleep easily knowing your information remains private.
- Won’t count as your company location. The platform doesn’t consider the shipping address when a brand searches for partners in a specific area. Define your location in Settings > Company information > Addresses.
Step 5. Highlight other content or offerings in links
Have cool links you want to showcase to brands that Media Properties don’t support? Click the Links toggle and add them.
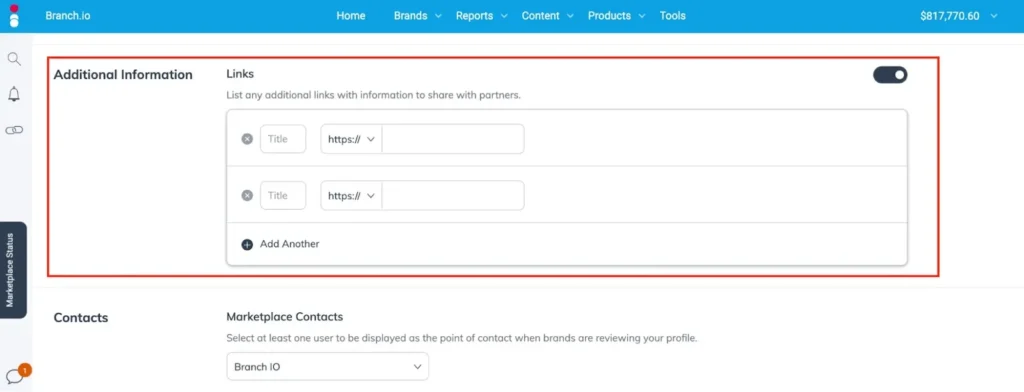
Whenever you can, it’s best to add your content as a media property because:
- It proves that it belongs to you
- It gets highlighted in your listing
- It helps you get recommended to brands more often
Step 6. Show off your full capabilities with a media kit
Finally, you can upload your complete media kit to the Media Kit section. This allows brands to learn more about your audience, content, and services.
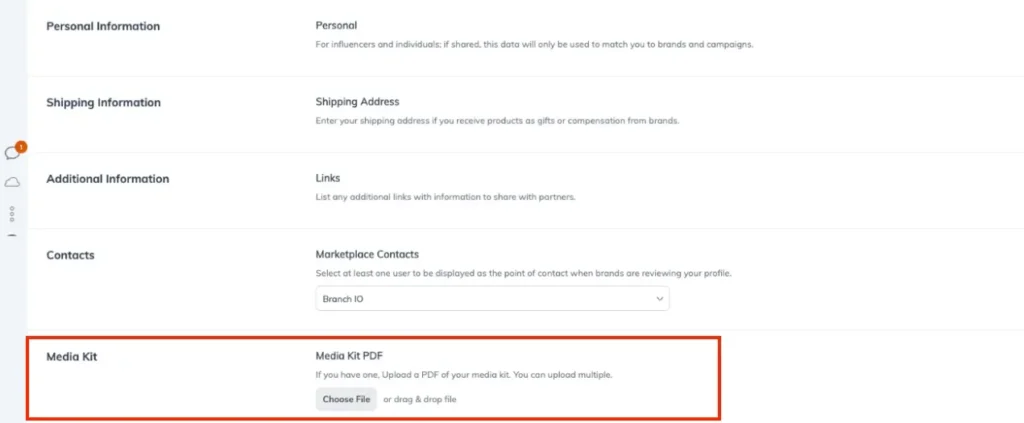
Once uploaded, your media kit will appear as an attachment in your listing.
If you have multiple media kits or a digital media kit, you can add then to the Additional Links section.
Need a media kit? We’ve got you covered with our creator media kit template.

Increasing partnerships with brands 20% YoY
Make brands fall in love at first sight
Your Marketplace listing sets the stage for a lasting impression—and you want brands to fall in love at first sight. It’s about showcasing your abilities and demonstrating how you can help brands achieve their marketing goals.
Take the time to provide detailed information in your listing. Connect all your media properties, curate your profile, and accurately describe yourself and your services. The more information you provide, your chances of finding the perfect match increase.
Brands aren’t just browsing the Marketplace—they’re actively searching for that special someone who stands out from the crowd. So make your first impression count and let your listing be the one that brands simply can’t resist!
Learn more about how to land better brand deals: